


Understanding how to Clean Hearing Aid Molds is vital for maintaining both the performance of your hearing aids and your hygiene. This guide is crafted to provide comprehensive, easy-to-follow instructions for cleaning your hearing aid molds effectively and safely. Regular cleaning is crucial regardless of the type of mold your hearing aids have.
For molds without built-in speakers, detachment and thorough washing are possible. However, molds with speakers require a more delicate approach to avoid damage. Proper cleaning keeps the molds hygienic and ensures the longevity and optimal functioning of your hearing aids. We will guide you through the recommended cleaning procedures, helping you to maintain your hearing aids in the best possible condition.
Key Takeaways:
- Regular cleaning of hearing aid molds is essential for their performance and hygiene.
- Molds without a speaker can be washed when detached from the hearing aid.
- Cleaning instructions vary depending on the type of mold you have.
- Retubing your ear molds should be done every 4-6 months.
- Open-fit tubes and open-fit hearing aids require specific cleaning and handling techniques.
Types of Hearing Aid Molds and Cleaning Instructions
Hearing aid molds come in different types, each designed to provide a secure fit and optimal sound transmission for specific hearing aids. Understanding the various types of molds and how to clean them is essential for maintaining the performance and longevity of your hearing aids.
The types of hearing aid molds are:
- Behind-the-ear (BTE) molds without a speaker/receiver
- Behind-the-ear (BTE) molds with a speaker/receiver
BTE molds without a speaker/receiver are commonly used, providing a comfortable and snug fit for BTE hearing aids. These molds can be detached from the hearing aid for easy cleaning. When cleaning, use a soft cloth to wipe the surface of the mold, removing any dirt or debris. A wire loop can gently remove any wax or buildup for the mold’s opening.
On the other hand, BTE molds with a speaker/receiver should not be washed as they contain sensitive electronic components. Cleaning these molds requires a different approach. Use a soft cloth to wipe the surface of the mold, ensuring that any contact with the speaker/receiver area is avoided. The mold’s opening can be cleaned with a wire loop, just like the molds without a speaker/receiver.
Properly cleaning your hearing aid molds is crucial for maintaining functionality and hygiene. By following the appropriate cleaning instructions based on the type of mold you have, you can ensure the longevity of your hearing aids and enjoy optimal hearing performance.
Step-by-Step Guide for Cleaning Ear Molds
Cleaning your ear molds is crucial to maintaining the performance and longevity of your hearing aids. Follow this step-by-step guide to ensure your ear molds are thoroughly cleaned:
- Detach the molds: Carefully remove the ear molds from your hearing aids. This will allow you to clean them more effectively without risking damage to the devices themselves.
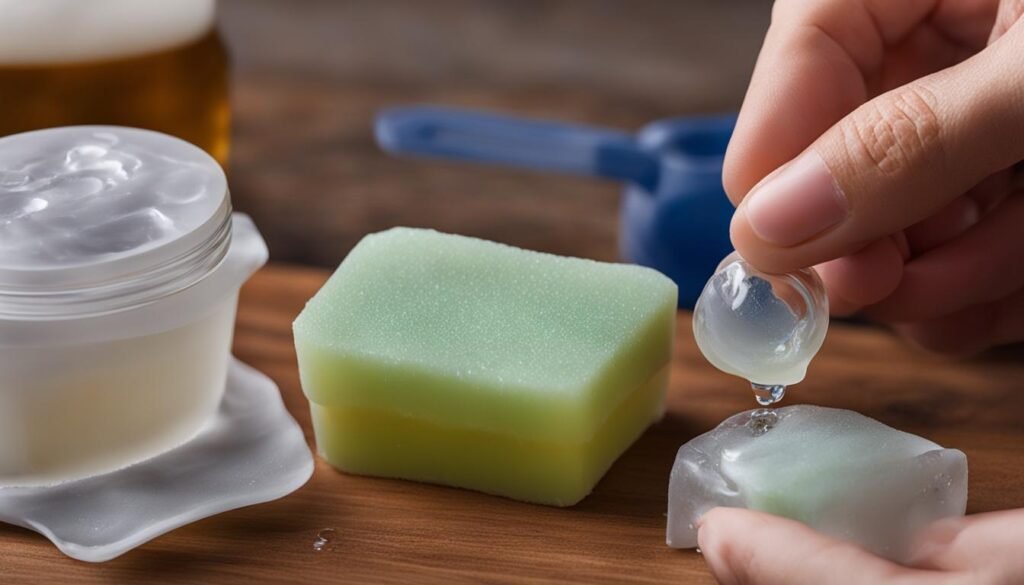
- Wash with warm, soapy water: Fill a basin or sink with warm water and add a small amount of gentle soap. Submerge the ear molds and use your fingertips to clean them thoroughly. Pay special attention to any wax buildup or debris inside the molds.
- Remove wax from tubing and vent hole: To remove wax from the tubing and vent hole, you can use a nail brush, pin, or cleaning wire. Gently insert the tool into the openings and carefully remove any accumulated wax.
- Rinse and dry: Rinse the ear molds under clean running water to remove any soap residue. Shake off excess water and place the molds on a clean towel to air dry overnight in a warm, dry place.
- Reattach the molds: Once the molds are completely dry, reattach them to your hearing aids, following the manufacturer’s instructions. Ensure a secure fit to optimize the performance of your devices.
By following these simple steps, you can ensure that your ear molds remain clean and free from wax buildup, allowing you to enjoy clear and comfortable sound from your hearing aids.
“Regular cleaning of ear molds is essential for maintaining the performance and hygiene of your hearing aids. Neglecting this important task can lead to decreased sound quality and discomfort.”
Remember to clean your ear molds regularly to prevent wax buildup and maintain optimal performance. This simple cleaning routine will help extend the lifespan of your hearing aids and ensure that you continue to experience the benefits of improved hearing.
Tips for Retubing Your Ear Molds
Retubing your ear molds is integral to maintaining your hearing aids and ensuring optimal performance. Over time, the tubing in your molds can become worn or damaged, impacting your devices’ sound quality and fit. Following these tips, you can easily retube your ear molds and keep your hearing aids in shape.
- Choose the proper tubing: When purchasing new tubing for your ear molds, select the appropriate size and type. It’s essential to match the diameter of the tubing to the existing tubing in your molds to ensure a proper fit.
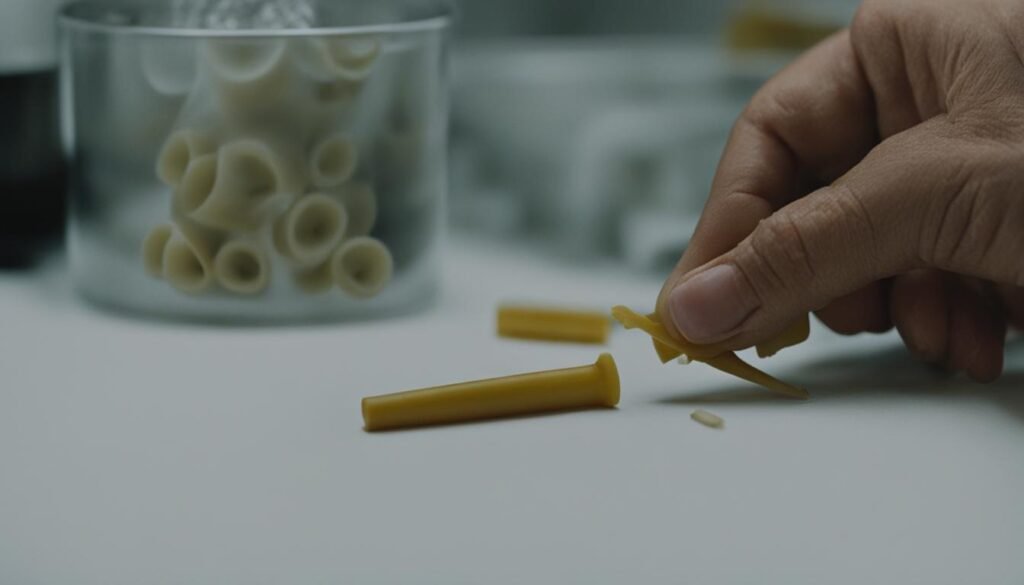
- Remove the old tubing: Begin by carefully removing the old tubing from your ear molds. You can use small scissors or a tubing removal tool to detach the tubing from the mold carefully. Take your time to avoid damaging the mold or other components.
- Attach the new tubing: Take the tapered end of the new tubing and thread it through the mold from the inside. Push the tubing until the sharp end is entirely through the mold, then trim any excess tubing. You can use the old tubing as a guide to determine the appropriate length.
- Secure the tubing: Attach it to the hearing aid once the new tubing is in place. Pull on the tubing to ensure it is firmly connected and won’t come loose during use.
Retubing your ear molds every 4-6 months is recommended to maintain optimal performance. However, if you notice any issues with the tubing, such as cracks or tears, it’s crucial to replace it sooner. Regularly inspecting your ear molds and tubing can help identify potential problems before they affect your hearing aids.
Following these retubing tips, you can keep your ear molds in excellent condition and ensure your hearing aids provide clear, comfortable sound. Don’t forget to consult the manufacturer’s guidelines for your specific hearing aids and molds to ensure proper retubing procedures.
Cleaning Open Fit Tubes and Inserting/Removing Open Fit Hearing Aids
Open-fit tubes are essential to open-fit hearing aids, allowing for comfortable and discreet use. Cleaning the open-fit lines regularly is necessary to ensure optimal performance and hygiene. Here are some steps to follow when cleaning the open-fit lines:
- Unscrew or quarter turn: Depending on the design of your open-fit hearing aid, the tubes may either unscrew or require a quarter turn before they can be removed from the hearing aid. Follow the manufacturer’s instructions to detach the lines safely.
- Cleaning the tube: Gently clean the end of the line, usually fitted with a dark grey dome. You can use a soft cloth or tissue to remove debris or earwax buildup. Avoid using sharp objects that may damage the tube.
- Removing debris: If any residue is stuck inside the tube, use a cleaning wire provided with your hearing aid or a soft brush. Be careful not to push the debris further into the box.
- Dry thoroughly: After cleaning, make sure the tubes are completely dry before reattaching them to the hearing aid. Excess moisture can affect the performance of the hearing aid.
Now that you know how to clean the open-fit tubes, let’s explore the correct way to insert and remove open-fit hearing aids:
- Insertion: Before inserting the open-fit hearing aid, ensure the battery drawer is open. Place the support over your ear and position the tube tip into your ear canal. Push the resource in until it fits snugly and comfortably.
- Removal: To remove the open-fit hearing aid, hold the tubing closest to the entrance of the ear canal and gently pull or wiggle it out. Avoid drawing too forcefully to prevent any discomfort or damage to the tubes.
By following these cleaning and insertion/removal instructions, you can ensure the longevity and optimal performance of your open-fit hearing aids.
“Regular cleaning and proper insertion/removal techniques are key to maintaining the functionality and lifespan of open fit hearing aids.” – Hearing Aid Specialist
Explore the latest insights on what is central hearing loss
Dehumidification for Rechargeable Hearing Aids and Odor Control
Proper dehumidification is crucial for maintaining the performance and longevity of rechargeable hearing aids. Excessive moisture can damage the delicate components of the devices, leading to malfunctions or reduced functionality. To effectively dehumidify your rechargeable hearing aids, consider using a dehumidifier specifically designed for hearing aids. These dehumidifiers often feature a UV lamp that helps disinfect the aids and remove bacteria or harmful microorganisms.
In addition to dehumidification, addressing any unpleasant odors that may develop in your hearing aid molds is essential. Odor control can be achieved through regular cleaning and specialized wipes, such as Audiowipes, which are recommended for hearing aids. These wipes help eliminate odor-causing bacteria and provide a gentle and safe cleaning solution for your molds.
If you prefer a more natural approach to odor control, try cleaning your hearing aid molds with pickling vinegar or baking soda. Dampen a cloth with the solution, gently wipe the surface of the molds, and allow them to air dry. However, it’s important to note that this method may only be suitable for molds that can be detached from the receivers, as excessive moisture could damage the internal components.
Incorporating proper dehumidification techniques and effective odor control measures into your hearing aid maintenance routine ensures that your rechargeable hearing aids provide optimal performance and remain fresh and odor-free.
Remaking Molds and General Care Tips
Remaking hearing aid molds may be necessary every 1-2 years, but the duration can vary depending on usage and individual needs. Over time, molds may become worn, loose, or uncomfortable, affecting both the fit and the functioning of the hearing aids. If you experience discomfort or notice a decline in performance, consider remaking the molds.
Regular cleaning is vital for general care for hearing aid molds. Use a soft, lint-free cloth to wipe the surface of the molds, removing any dirt or debris. Avoid using harsh chemicals or abrasive materials that can damage the molds. Additionally, it’s essential to keep the hearing aids away from water as much as possible. Moisture can lead to damage and decrease the lifespan of the devices. Use a dehumidifier or a drying kit specifically designed for hearing aids to remove excess water.
How to tell if tinnitus is permanent? Delve into the specifics in our in-depth article, discussing the signs and factors that indicate the permanency of tinnitus.
Proper insertion and removal techniques are also crucial for maintaining the integrity of the molds. Avoid pulling on the tubing or yanking the molds out forcefully, as this can cause damage. Instead, gently twist or wiggle the molds to remove them from the ears. When inserting the molds, ensure they are positioned securely and comfortably in the ear canal. Consult your hearing healthcare professional for guidance if you’re experiencing difficulties or discomfort.
Summary:
- Remake hearing aid molds every 1-2 years based on individual needs.
- Regularly clean molds with a soft cloth, avoiding harsh chemicals.
- Avoid water contact and use a dehumidifier to remove moisture.
- Insert and remove the molds gently to prevent damage.
Conclusion
Properly cleaning and maintaining your hearing aid molds is crucial for ensuring optimal device performance and longevity. By following the proper cleaning methods, detaching molds for washing when possible, and practicing good hygiene habits, you can extend the lifespan of your molds and hearing aids.
Regular cleaning is vital to keeping your hearing aid molds in top condition. Use appropriate cleaning tools, such as a soft cloth for the surface and a wire loop for the openings. Detach the molds whenever possible to wash them in warm, soapy water, and remember to rinse them thoroughly and let them dry overnight in a warm, dry place.
Read Also: How to Clean Hearing Aid Microphone
Alongside cleaning, practicing proper care for your hearing aid molds is essential. Avoid exposing them to water, as moisture can damage the electronic components. Additionally, make sure to insert and remove the molds correctly to prevent any accidental damage. Replacing soft molds more frequently is recommended due to their wear and tear.
By following these steps and maintaining proper care for your hearing aid molds, you can enjoy an enhanced hearing experience and prolong the lifespan of your devices. Take the time to invest in the maintenance of your molds, and you’ll reap the benefits of improved device performance for years to come.
Frequently Asked Questions
How do I clean hearing aid molds?
Cleaning hearing aid molds involves detaching them from the hearing aid and washing them in warm, soapy water. Use a gentle soap suitable for the body. You can use a nail brush, pin, or cleaning wire to remove wax from the tubing and vent hole. Rinse the molds in clean water, shake off excess water, and let them dry overnight in a warm, dry place. Reattach the mold to the hearing aid properly.
Can I wash molds with a speaker/receiver?
No, molds with a speaker should not be washed. Only molds without a speaker can be washed. Cleaning instructions for molds with a speaker include using a soft cloth for the surface and a wire loop for the opening.
How often should I retube my ear molds?
Ear molds should be retubed every 4-6 months. To retube:
- Remove the old tubing and thread the tapered end of the new tubing through the mold.
- Pull the tubing through until the sharp end is entirely through the mold, and cut off any excess.
- Attach the tubing to the hearing aid properly.
How do I clean open-fit tubes and insert/remove open-fit hearing aids?
Open-fit tubes can either unscrew or require a quarter turn before pulling them off the hearing aid. The end of the line, a dark grey dome, can be cleaned gently. Use a cleaning wire to remove any debris. When inserting open-fit hearing aids, ensure the battery drawer is open, place the assistance over the ear, and push the tip down into the ear canal. To remove, hold the tubing closest to the entrance of the ear canal and pull/wiggle out.
How do I dehumidify rechargeable hearing aids and control odor?
Dehumidification is essential for rechargeable hearing aids. Some dehumidifiers come with a UV lamp that helps disinfect. For odor control, you can use wipes recommended for hearing aids, such as Audiowipes, or clean with a pickling vinegar or baking soda solution. Avoid soaking molds if they cannot be detached from the receivers.
How often should I remake my hearing aid molds?
Remaking molds may be necessary every 1-2 years, but the duration can vary depending on usage. General care tips for hearing aid molds include regular cleaning, avoiding water contact with the hearing aids, and practicing proper insertion and removal techniques. Soft molds may need replacement more frequently.
What are some general care tips for hearing aid molds?
Some general care tips for hearing aid molds include regular cleaning, avoiding water contact with the hearing aids, and practicing proper insertion and removal techniques. Soft molds may need replacement more frequently. Cleaning and maintaining hearing aid molds is essential for device performance and longevity.